The Kolibri portal: A user guide for our freelancers
Our freelancer portal is the beating heart of our project management process. We are always trying to develop and refine it. Our aim is to provide an efficient system that meets our internal project management and accounting needs as well as your needs as a freelancer.
The portal allows you to access all your current and completed projects, manage new assignments and view financial documents. It’s important to us that we keep you informed about projects at all times – so you’ll also receive automated emails via our portal. Of course, this in no way replaces personal communication. You can still get in touch with your contacts at Kolibri at any time.
In this article, we’ll show you how to get started and navigate our portal with ease.
Note:
At the moment, freelancers cannot edit their own profile in our new portal. This means you cannot edit your address, specialisms or payment details in the new portal. If you want to make changes to your profile, please use our “old” system: intranet.kolibri.online/intranet
Your contacts
Do you have any questions about our portal? Maybe you need a hand or would like to suggest a function that would make your work easier? Feel free to send us an email or call us. We’ll respond to your message as quickly as possible.

Anne Addicks
Partner Management
+49 40 5247774-15
freelancer@kolibri-online.com

Marco Lupo
Senior Project Management, Localisation and Multilingual Content
+49 40 5247774-17
m.lupo@kolibri-online.com
New assignments: Overview and how to accept
1. Notification
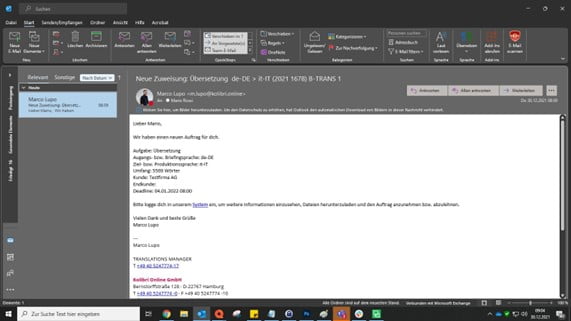
You will be informed of new assignments via email. This email will contain key information about the assignment and a link to the freelancer portal, which takes you to the project overview. Once there, you can view further information about the project and either accept or decline the assignment.
2. Project overview
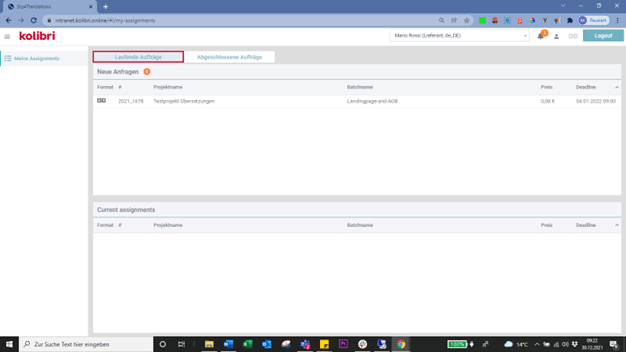
In the “Project overview” tab, the top half of the page shows all outstanding assignment requests, while the bottom half shows all assignments you have already accepted.
Click on an assignment to access a detailed view of that assignment.
3. Project detail view
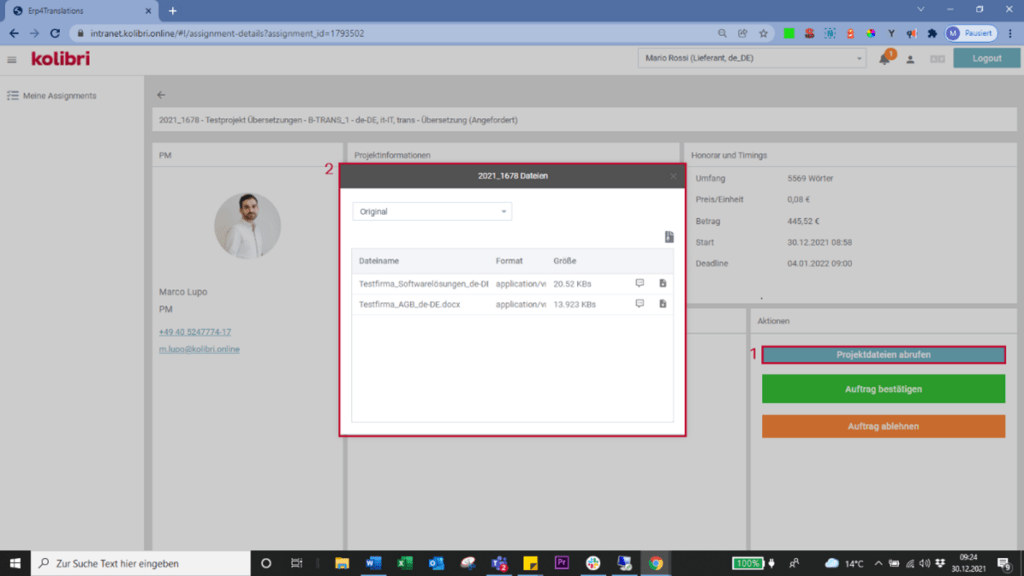
The detailed view displays full information about the assignment, including the project number, batch name, the source and target languages, project type, scope, deadline and fee.
On the left, you can see the Kolibri contact person for the assignment, who you can contact if you have any queries or remarks.

4. Source files and reference files
Click the Browse project files button to view and download the source files (primarily important for translation projects), reference files and briefing. This opens a new module.
You can use the dropdown menu to navigate between Source (Original) and Other project information (Projektinfos extern) folders. The Other project information folder might contain reference files, briefings, glossaries and so on.
Caution:
A single project (as defined by a project number, i.e. 2022_XXXX) may be split across several assignments (sometimes also called “orders”). The source and reference files will be the same for all assignments in a given project.

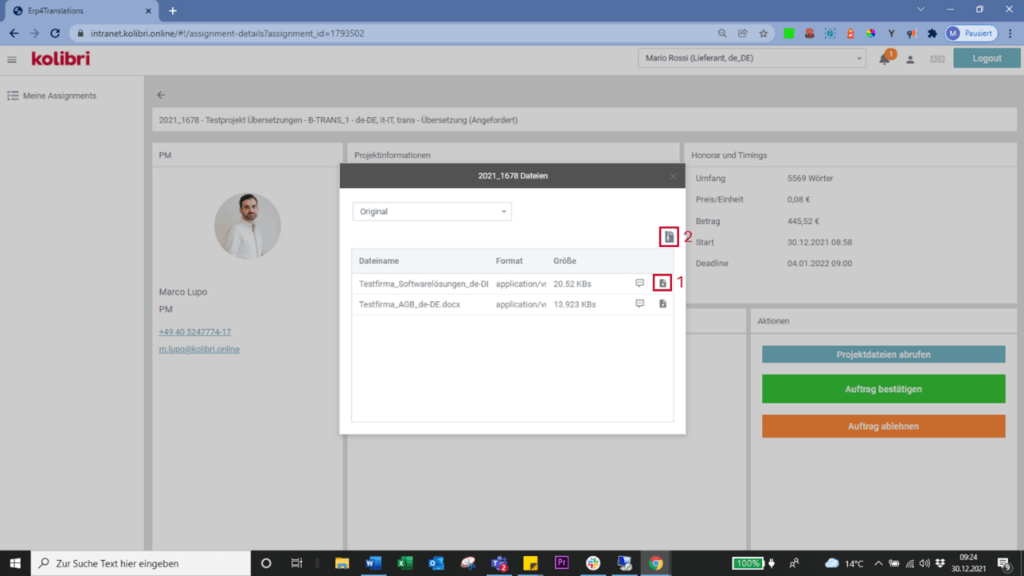
If you click the download icon (1) you will download only that file. If you would like to download all files at the same time, click the archive symbol (2). This will download all files in a zip folder.
Caution:
Using the archive download function will only download the files in the folder you are currently viewing (e.g. Source).
5. File-specific comments
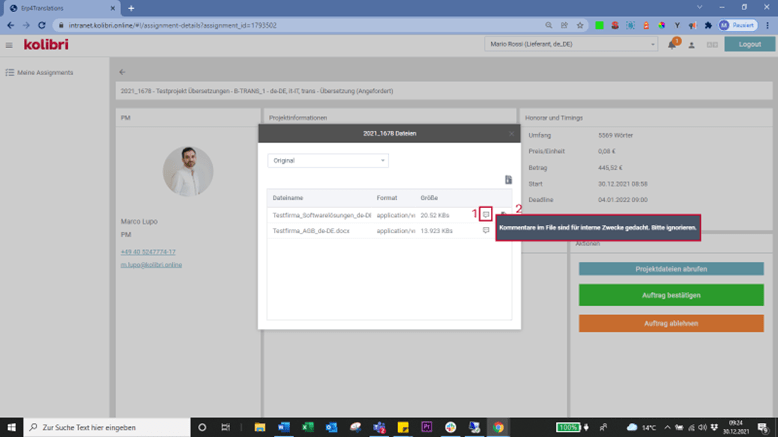
An individual comment (2) containing important information can be assigned to each file. Always check for comments so you don’t miss any information.
You can view the comment by hovering over the comment icon (1).
6. Accepting and declining assignments
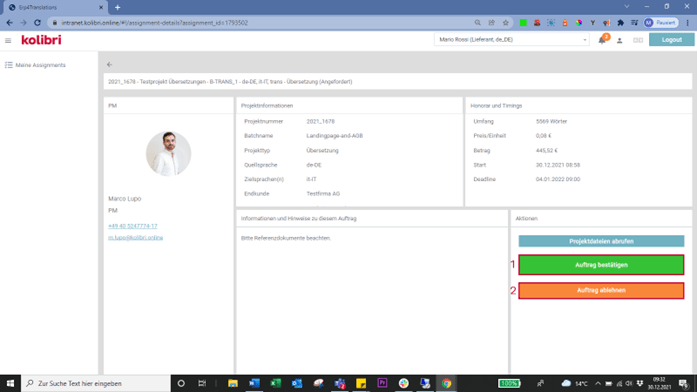
If you would like to accept (1) or decline (2) an assignment, click on the corresponding button in the project detail view.
Please note:
If you are interested in an assignment but cannot accept it due to the deadline, get in touch with the Kolibri contact before you decline, as we may be able to push the deadline back.
Current assignments
1. Purchase order
Once you have accepted an assignment, you will receive automatic confirmation of this via email along with a purchase order (PO).


You can also download the purchase order from the portal by accessing the detailed view for that assignment and clicking on Download purchase order.
2. Work files
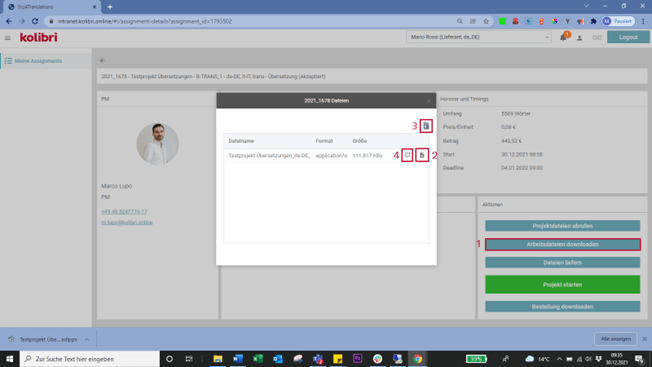
To download work files click on Download work files. This opens the download module. You can download files individually (2) or together as a zip file (3) and view file-specific comments (4).
3. Assignment status
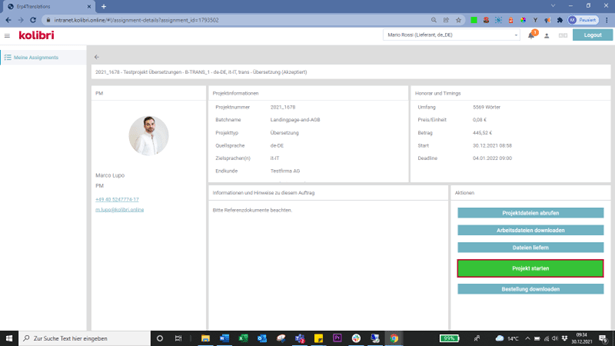
To let the Kolibri contact know that you have started to work on the assignment, click on Set to in progress in the project detail view.
4. Upload files
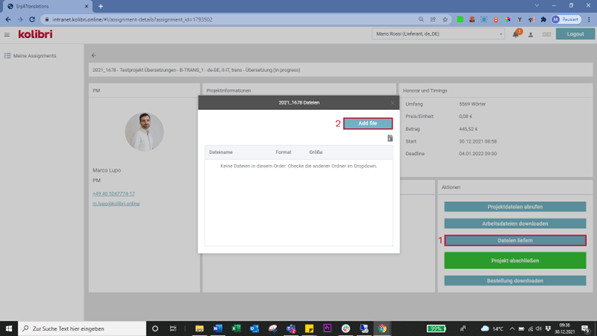
To deliver files (e.g. Trados return packages, final versions of texts, etc.), click on Deliver files in the project detail view. This opens the upload module.
Click on Add file(s), select the file(s) you want to upload and then click Open to confirm.

5. Delivery comments
Once you have selected and confirmed at least one file for upload, a window will open with a text field. You can use this to input any file-specific comments for the project manager. If you don’t have any comments to add, you can simply leave the field empty and click on Save.
6. Close assignment
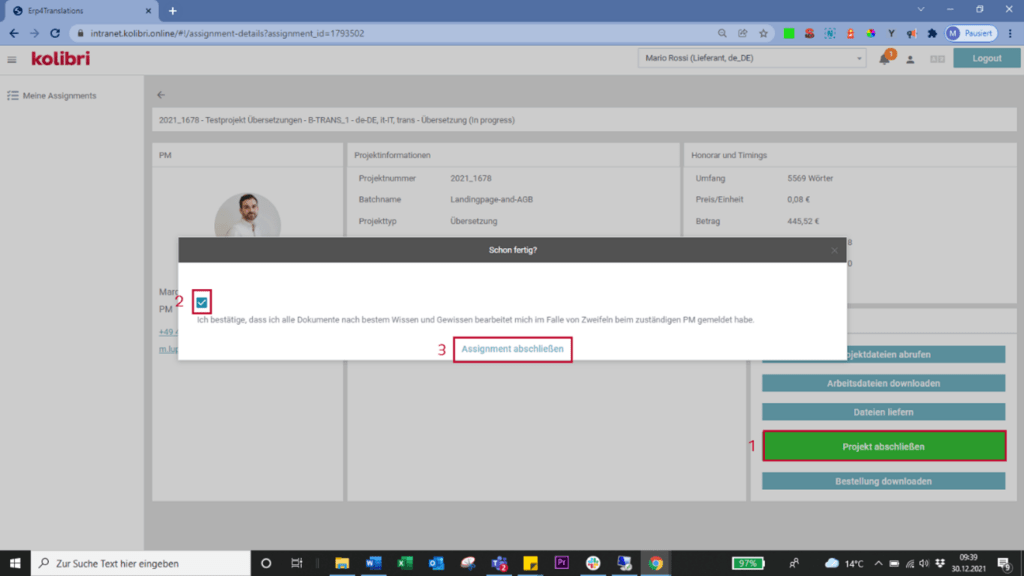
Once you have uploaded all your files and checked your delivery, click on Set to work finished. This will remove the project from your list of current assignments. You then need to confirm that you have completed the order to the best of your ability and click on Close assignment. Only then is the assignment considered complete.

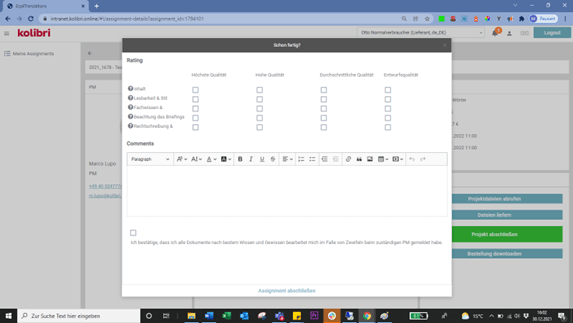
If you are a proofreader for an assignment, in this step you also need to provide an assessment for the translator or copywriter. You have to rate the content, readability & style, expertise & terminology, adherence to the briefing, and spelling & grammar.
If necessary, you can also enter a general comment about the translator or copywriter’s work for the project manager’s attention.
7. Credit note
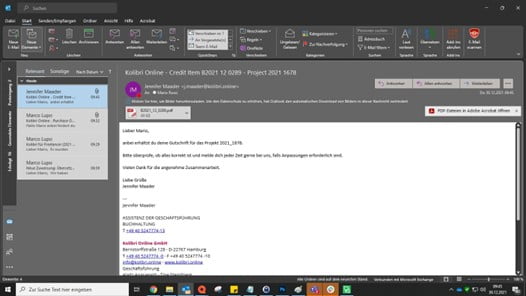
Once Kolibri officially closes the project, you will receive a credit note. This might not happen on the same day you deliver your files but will arrive within a few days or by the end of the month at the latest.
Once we issue the credit note, you can also access and download it from the project detail view of the respective closed assignment.

Closed assignments
You can access closed assignments in the portal at any time, such as to re-download purchase orders or credit notes. To do this, from the project overview page, click on the Closed assignments tab and select your desired assignment.
Notification types
In the course of a project, you will receive various messages from our system. We explained the first two (New assignment and Purchase order) earlier on. We send the most important notifications via email to ensure you don’t miss any key information.

Files are available for download
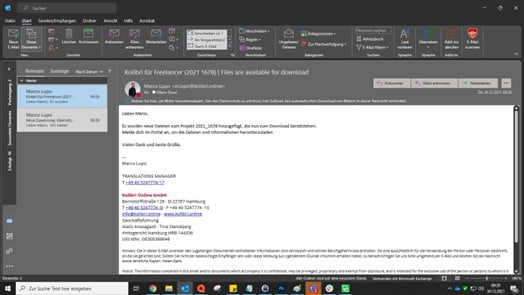
This means that new files (either source files, project information or work files) have been uploaded to the portal.
Credit note
This means that your credit note has been issued, either because the project has been closed or because it is the end of the month.

Change your profile picture
You can change your profile picture by clicking on the user icon (1) in the top right corner of the portal. This opens the file browser window. Select your desired profile picture and click Open to confirm.
FAQs
We set up projects when we receive a request from one of our clients and take our lead from the respective client’s needs. Each project has an eight-digit project number (2023_XXXX). A project might contain several assignments/orders, each with an individual batch name to help us distinguish them. The project manager chooses each batch name.
Project files are relevant to, and can be accessed in, all assignments with the same project number. These might be source files (for reference), general briefings, style guides, glossaries or other reference files. Work files, on the other hand, are only relevant for a specific assignment. In translation projects, work files could be Trados packages; in content projects, they might be text-specific briefings or templates.
At the moment, you can only edit your user profile in our old portal. We’ll let you know as soon as this function is available in the new system. Until then, please keep your profile up to date here. Your login details will be the same as in the new system.